Mail Flow Rules also called transport rules recognize and respond to messages passing through Exchange Online.
Similar to the Inbox rules found in Outlook and Outlook on the web, mail flow rules are also available in Outlook. One key distinction is that, unlike mailbox-based rules, mail flow rules intervene with messages while they are in motion. Mail flow rules are also called Transport Rules.
What Are Mail Flow Rules?
Mail flow rules allow you to manage how emails flow through your organization. These rules can automatically take action on messages based on specific conditions.
Requirements to Configure Mail Flow Rules
It is required for a user to have access to the Exchange admin or Exchange Online PowerShell to configure mail flow rules. Administrators like Global admin and Exchange admin can configure mail flow rules. The permissions needed are important for security purposes.
Creating Mail Flow Rules
There are two methods of creating a mail flow rule.
- Exchange Admin Center (EAC)
- Exchange Online PowerShell
Creating a mail flow rule requires rule conditions, exceptions, actions and settings.
Mail flow Rule Conditions
Conditions specify messages to include.
- You can configure a rule to apply only to messages containing specific words.
- Apply the rule to messages sent by specific users.
- Target all messages except those sent by members of a specific distribution group.
- Most conditions have one property that requires one or more values.
Case Study for Rule Conditions
You can create a rule to prevent organisation users from sending emails to Gmail or Hotmail. Your goal with the rule is to prevent any sensitive information or details from being sent to their personal Gmail or any other Gmail.
The condition will state that the rule should be applied that the email should be blocked if any recipient’s address includes Gmail or Hotmail.
Rule Exceptions
Exceptions specify messages to exclude. They use the same settings and syntax as conditions.
For every condition, there’s a corresponding exception. The only difference is that conditions include messages, while exceptions exclude them.
- Exceptions help fine-tune rule behaviour.
- Exclude specific senders from a rule that applies to all other messages.
- Avoid applying a disclaimer to messages with certain characteristics.
Case Study for Rule Exceptions
The Gmail rule can be excluded from some users within the organization. Let’s say the CEO or IT Admin need to be able to send emails to Gmail accounts, you will apply an exception. The exception will state “Except if the sender is [email protected] or if the sender is a member of this group [email protected] .
When creating rules in the Exchange Admin Center (EAC), the displayed value in the “Apply this rule if” or “Except if” field may differ from the initial selection due to shortening.
PowerShell allows you to create rules without specifying any condition parameters by using [Apply to all messages].
Rule Actions
Now, let’s briefly touch on rule actions. These define what happens when a mail flow rule matches the specified conditions.
Rule actions include tasks.
- Adding disclaimers to messages
- Redirecting messages to specific recipients
- Moving messages to folders
- Setting flags or categories
- Forwarding messages
- Deleting messages
Each Rule object has an Actions property representing the actions for that rule. It also has Conditions and Exceptions properties for defining the rule’s criteria.
These rules play a crucial role in managing email flow and ensuring compliance within organizations.
Rule Settings
Setting rules requires priority and enforcing the rules. Rule Priority is the importance and order of rules to ensure they are executed. Rule priority is important because. It determines the order in which these rules are applied. Higher priority means a rule is processed earlier in the sequence.
How to Set Rule Priority
1. In the Exchange Admin Center (EAC). Go to Mail flow > Rules.
2. The rules are listed in the order they’re processed. The rule at the top has Priority value 0 and is processed first.
To change priority:
1. Click on the rule you want to adjust.
2. Use the Move Up or Move Down arrows to change its position.
Using the Exchange Admin Center (EAC)
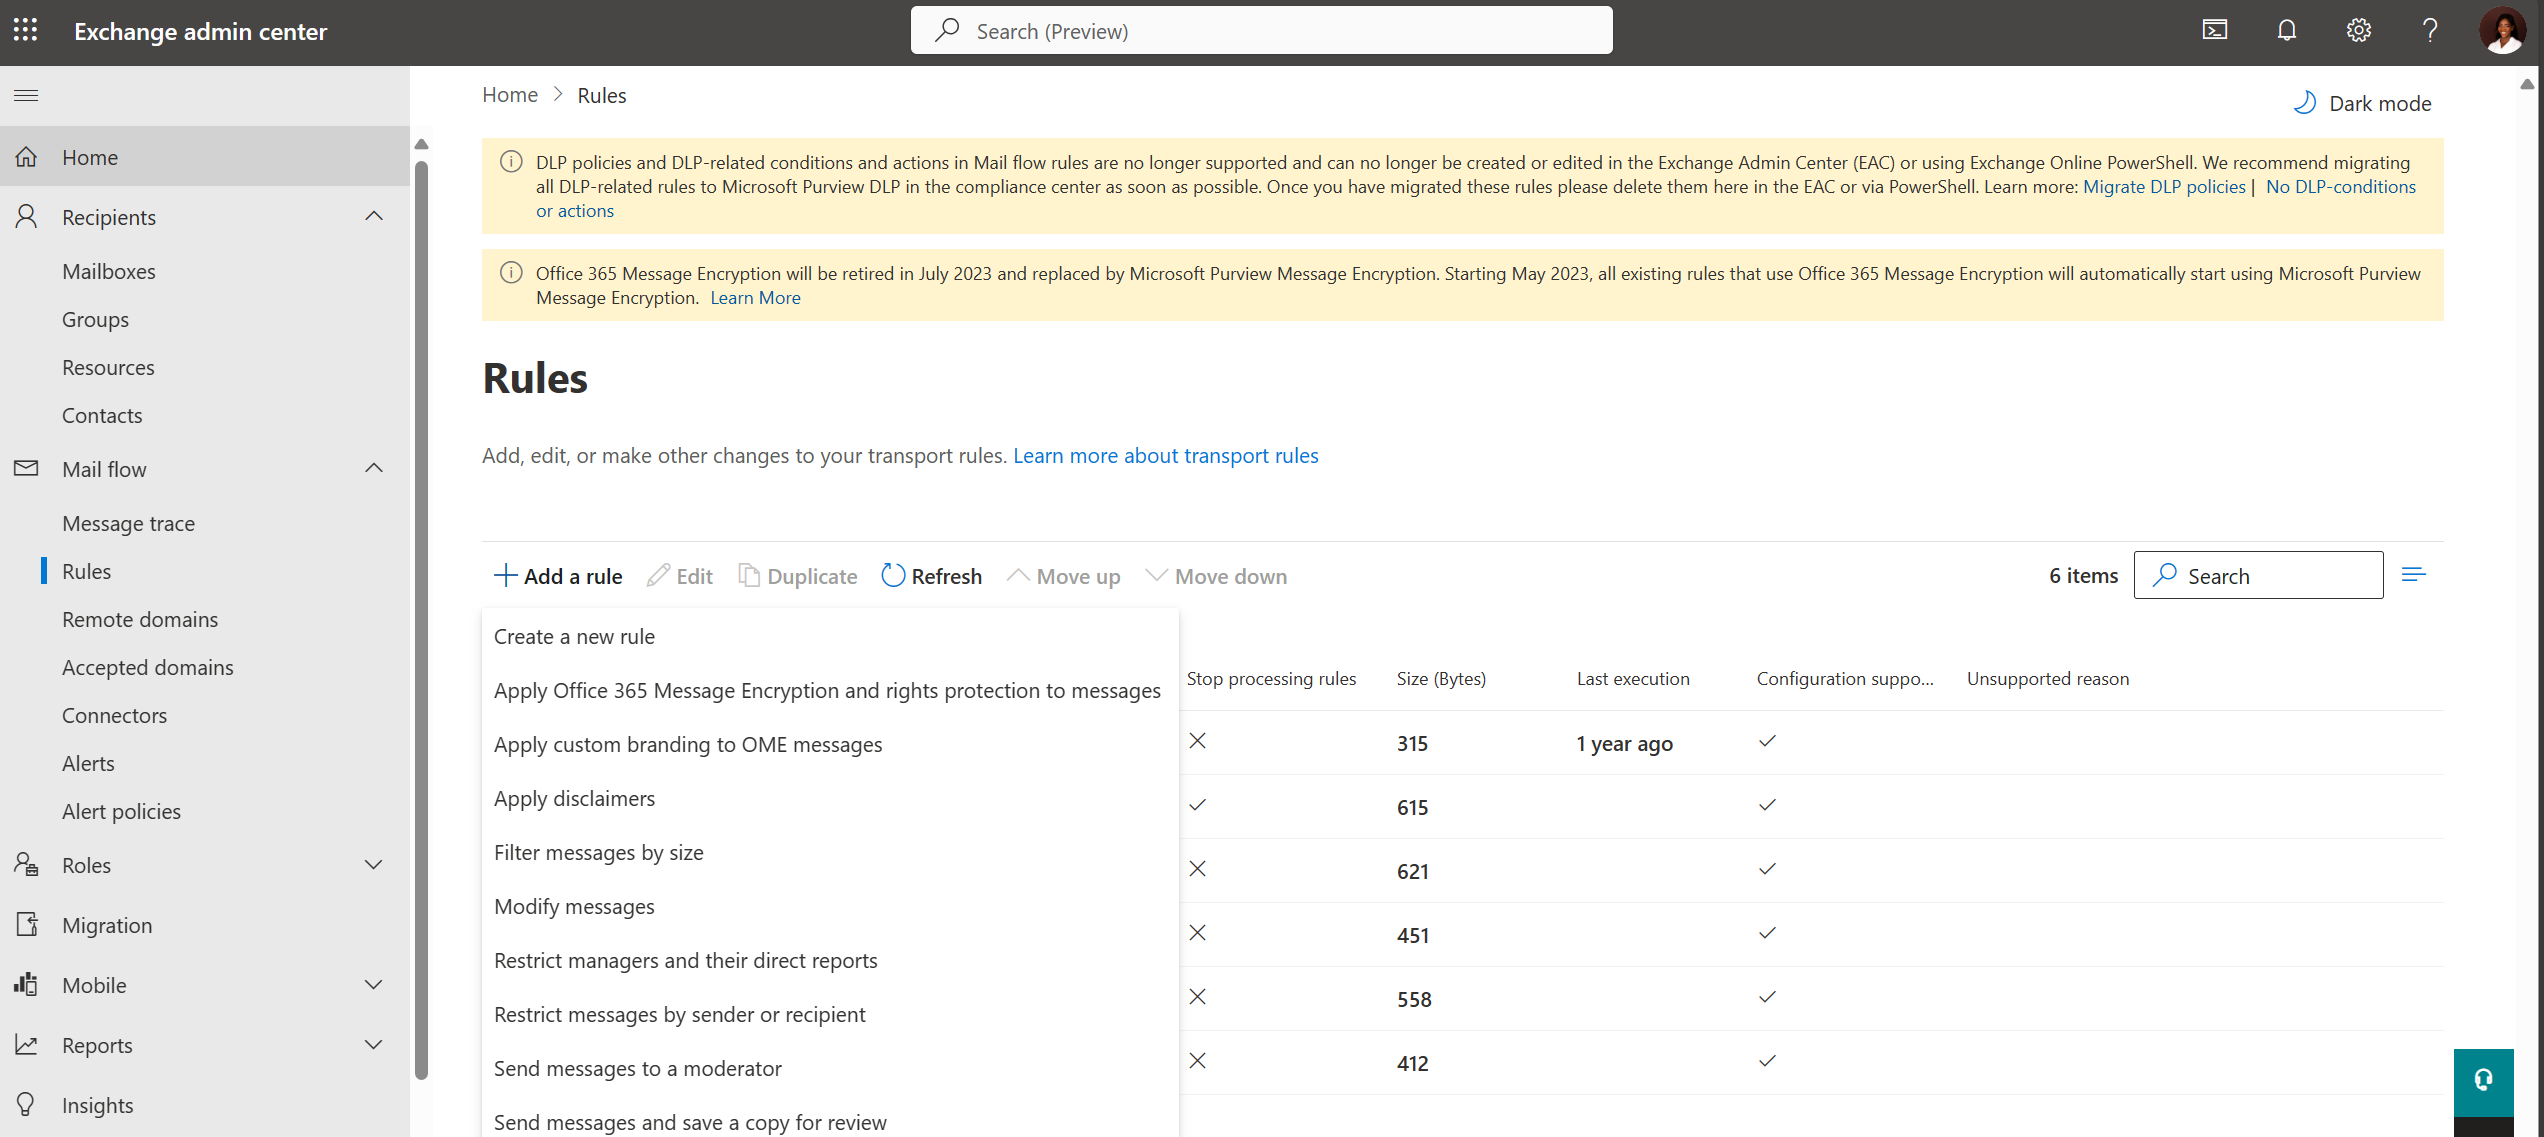
- Navigate to the Mail flow – Rules section in the new EAC.
- Choose from templates or create a new rule from scratch.
- Specify conditions, exceptions, and actions for the rule.
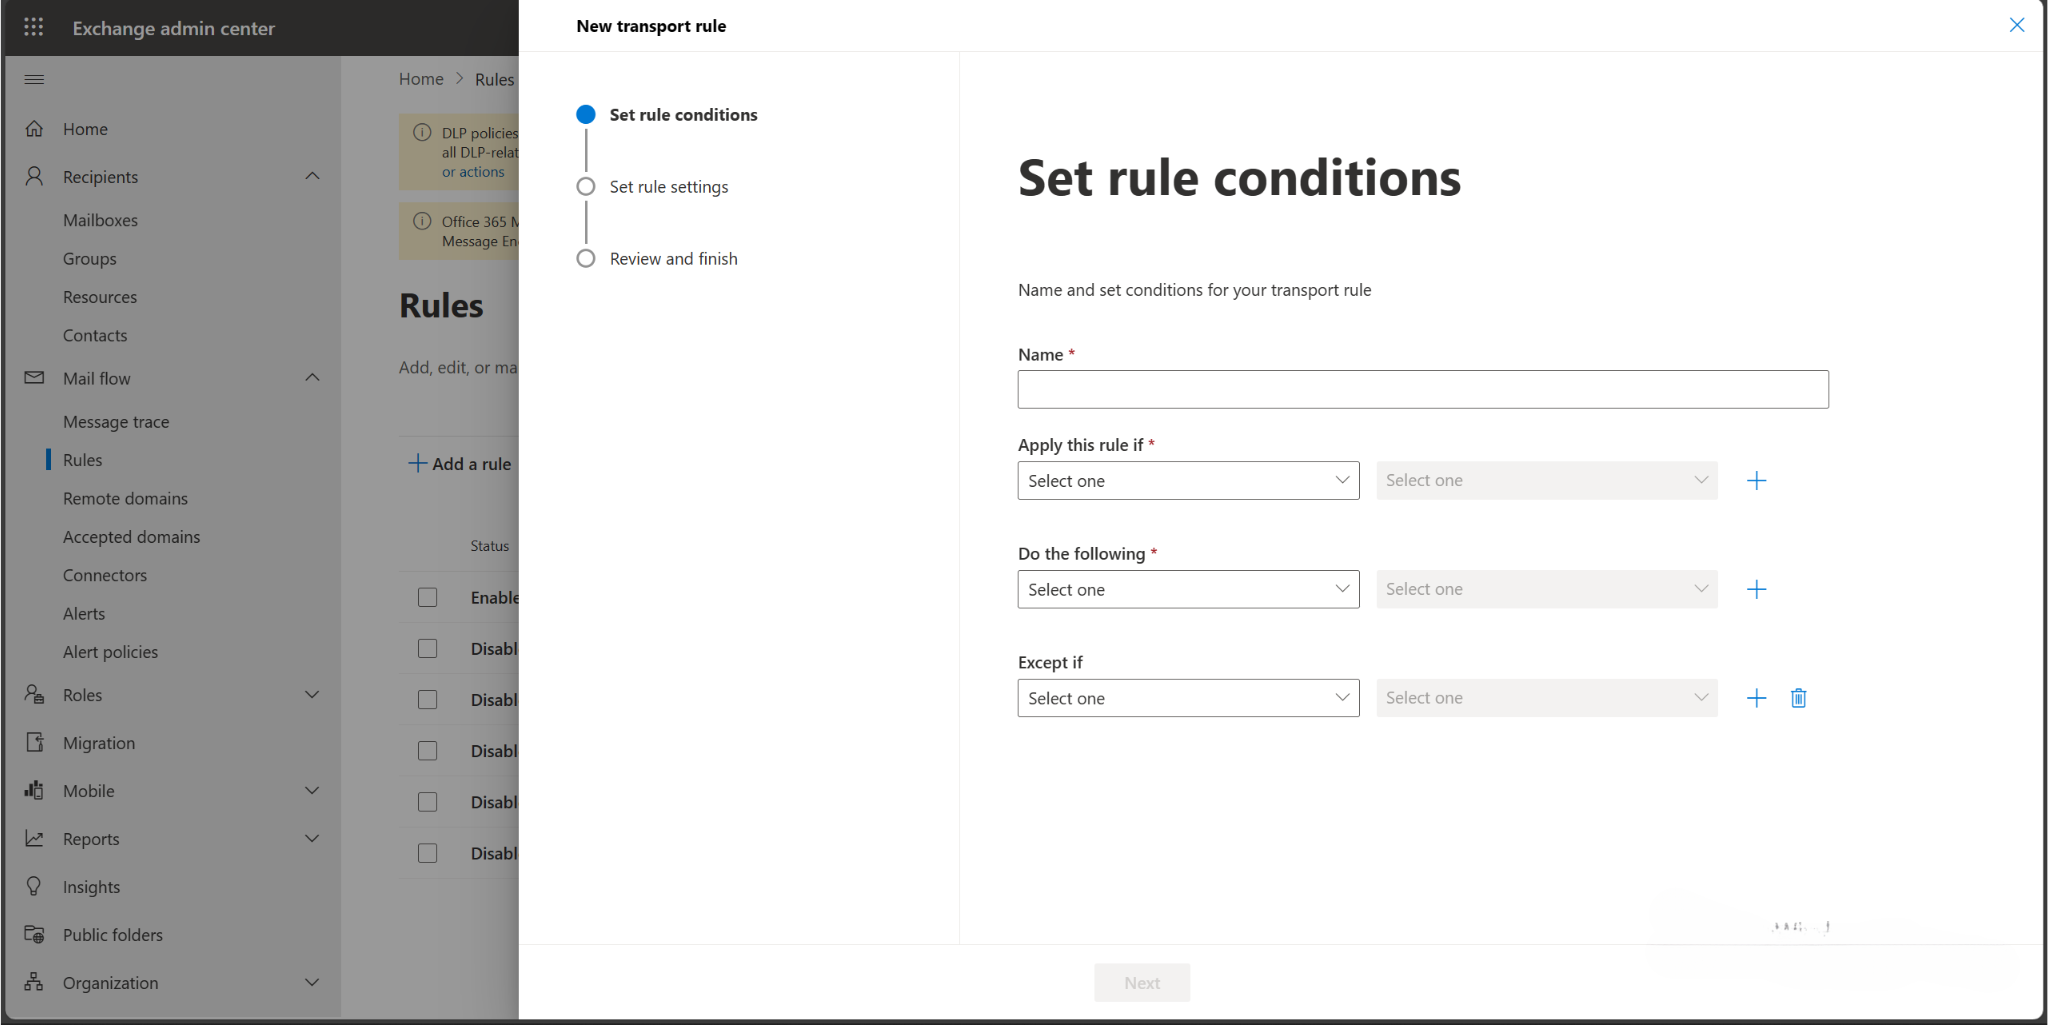
EXAMPLE- CREATE A MAIL FLOW RULE
Create a mail flow rule to restrict users from sending emails to Gmail or Hotmail. The concept is to ask the admin for approval to send the email. However, the IT admin group and CEO should be able to send emails to Gmail or Hotmail.
The concept of creating the rule will determine the options you choose and the words you add in the checkbox.
- Navigate to Mail flow > Rules > Add a Rule > Create a new rule.
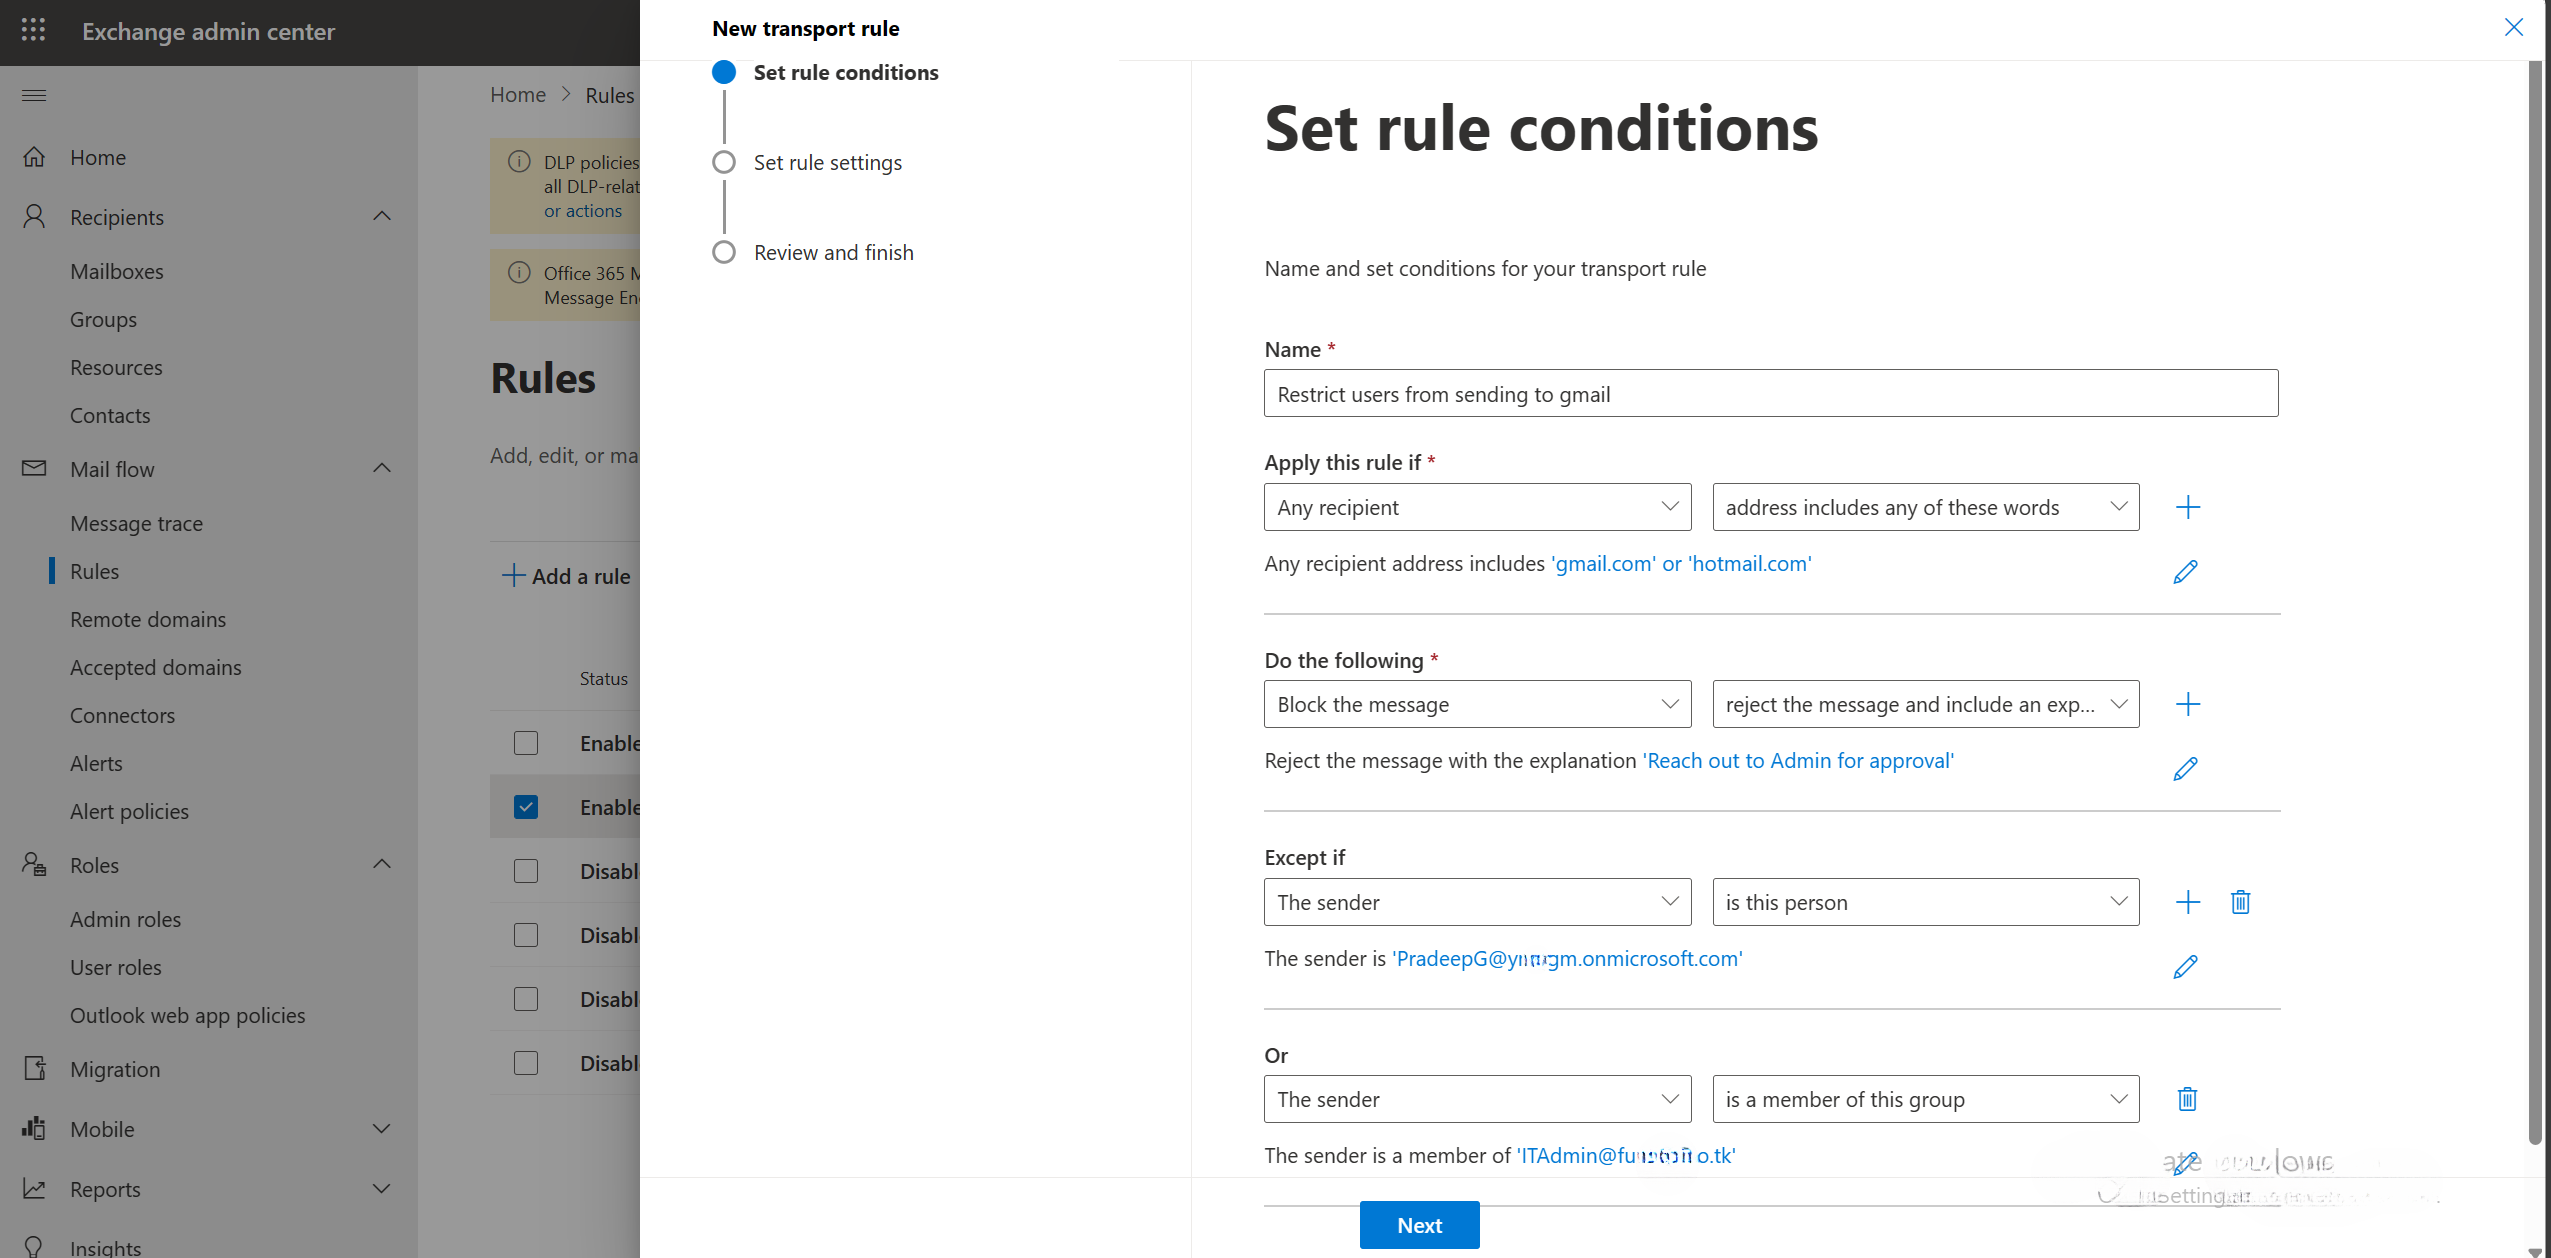
- Name the rule.
- Condition: Apply this rule if “any recipient address includes any of these words Gmail or Hotmail”. Selecting the options gives you a box to add the words.
- Actions: “Do the following – reject the message and include an explanation, reach out to admin for approval”. Selecting the option opens a box to add the message for the users.
- Exceptions: “Except of the sender is this person – Pradeep”. Choosing the option “is this person” allows you to choose the CEO’s email address. To add more exceptions, click on +. To add the IT admin- “Or the sender is a member of this group- ITAdmin”.
- Click on Next.
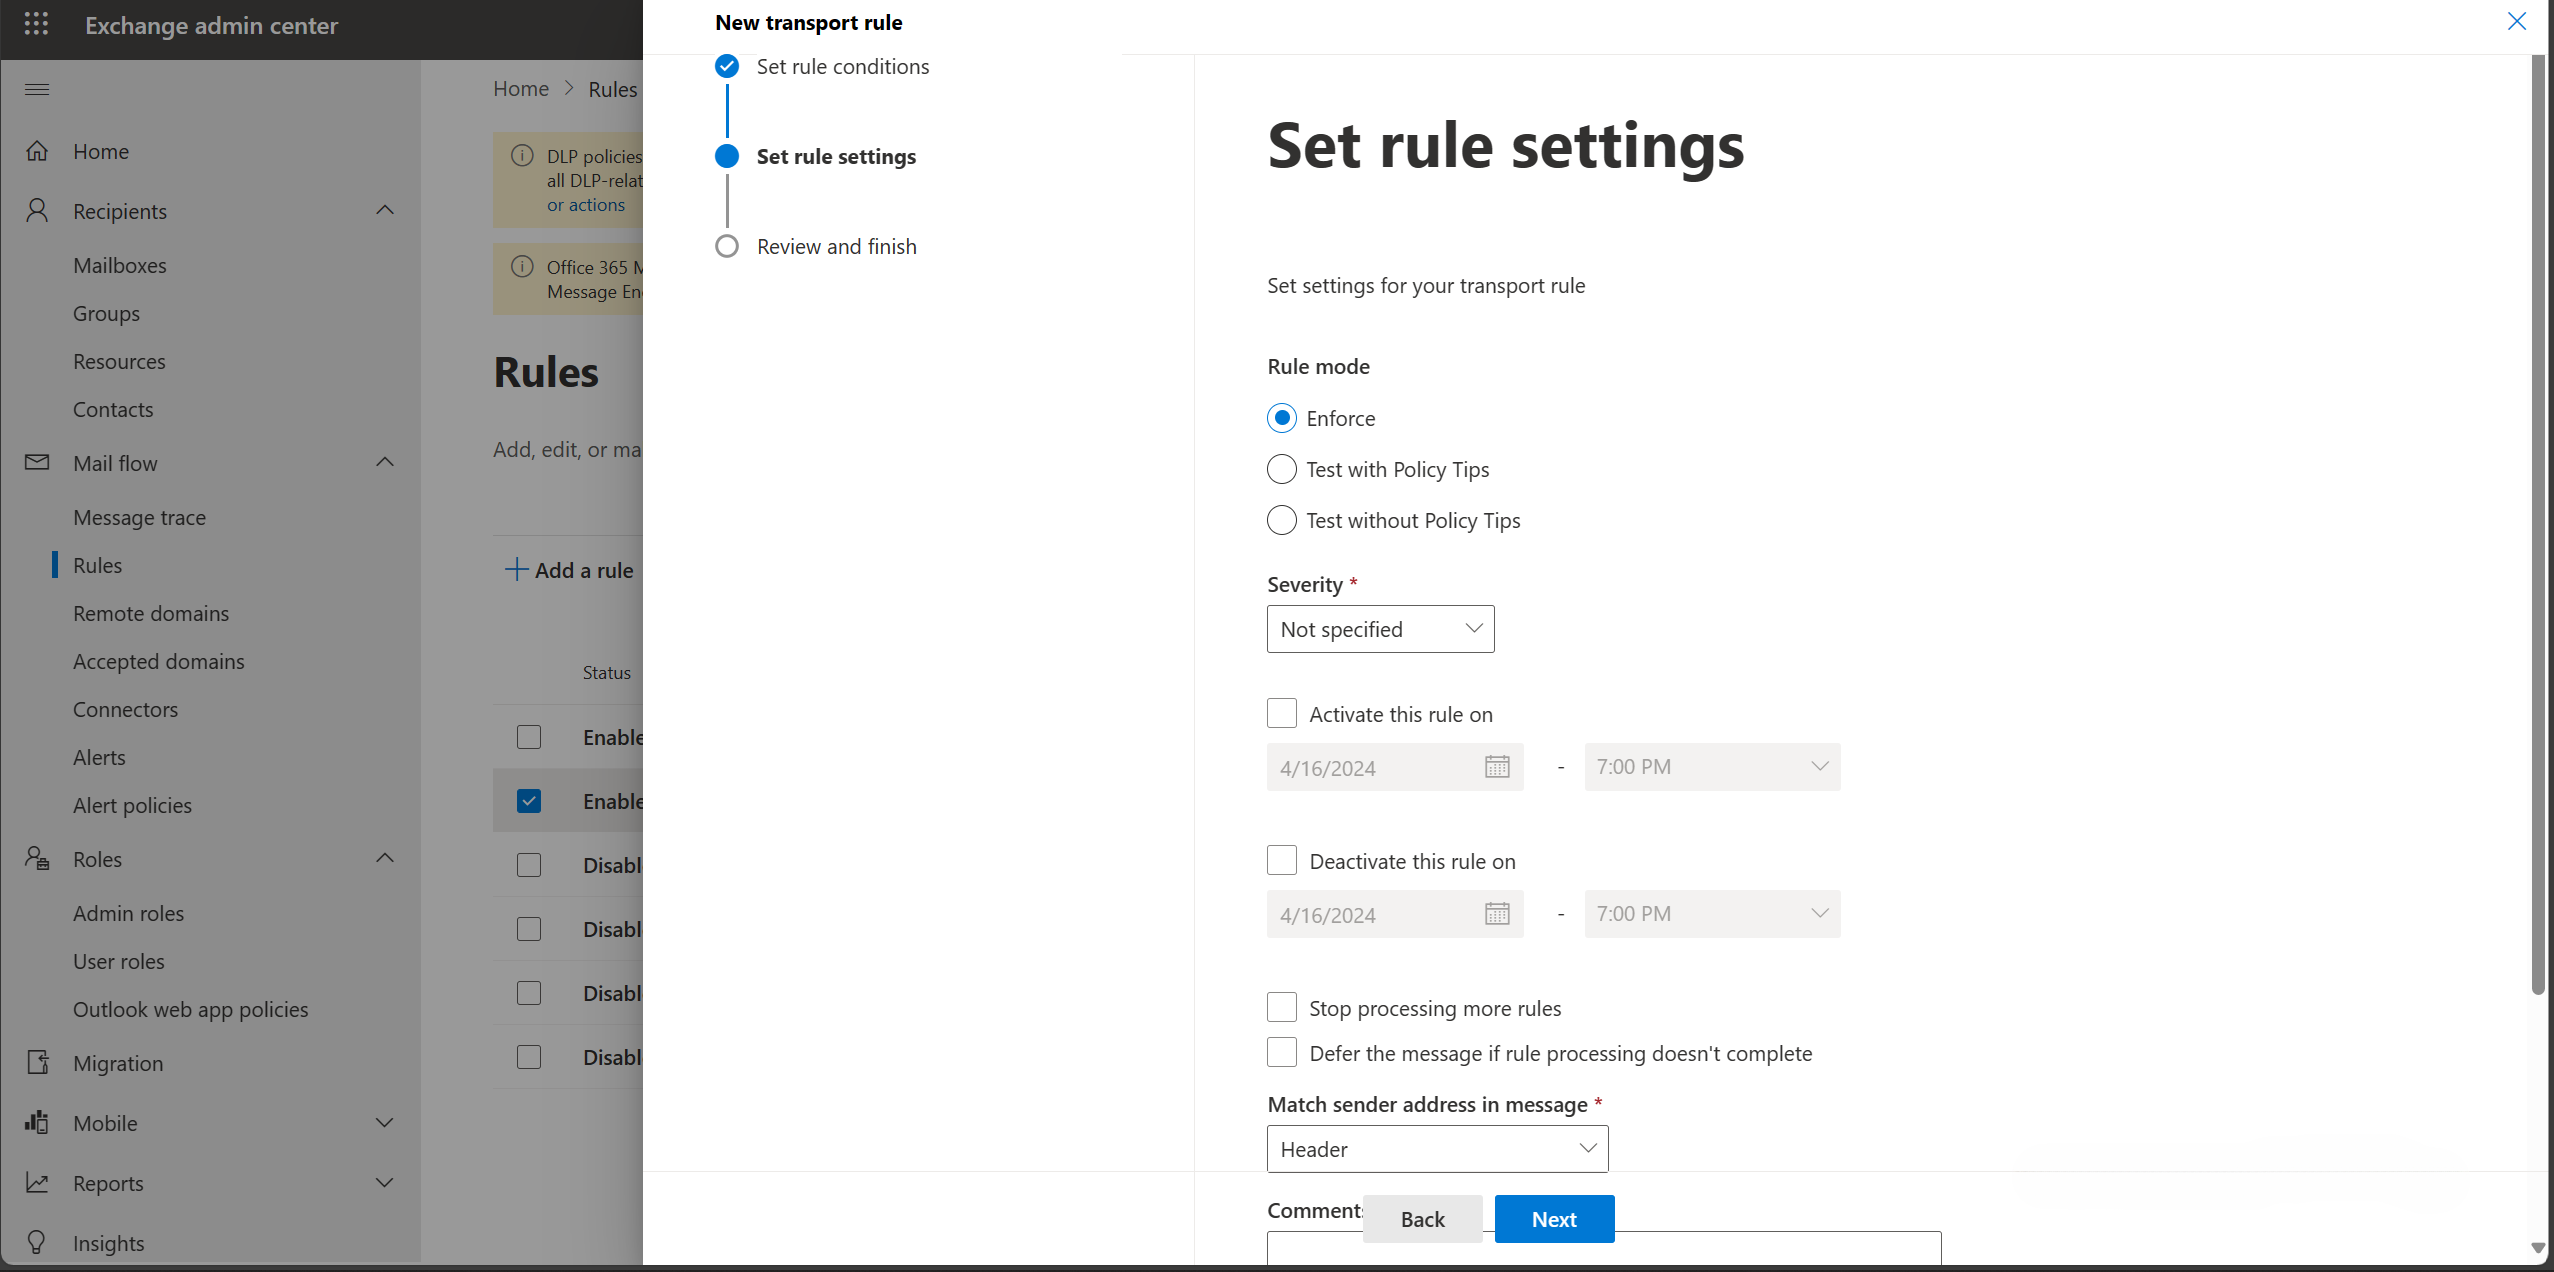
- Rule Settings – Enforcing the rule mode will enforce it across organisation users.
- Rule Settings – Activate the rule within a specified date if you want the rule to run for some time.
- Rule Settings – Test. You can test the rules as an admin before it is enforced for all the users to ensure it is working.
- Click on Next
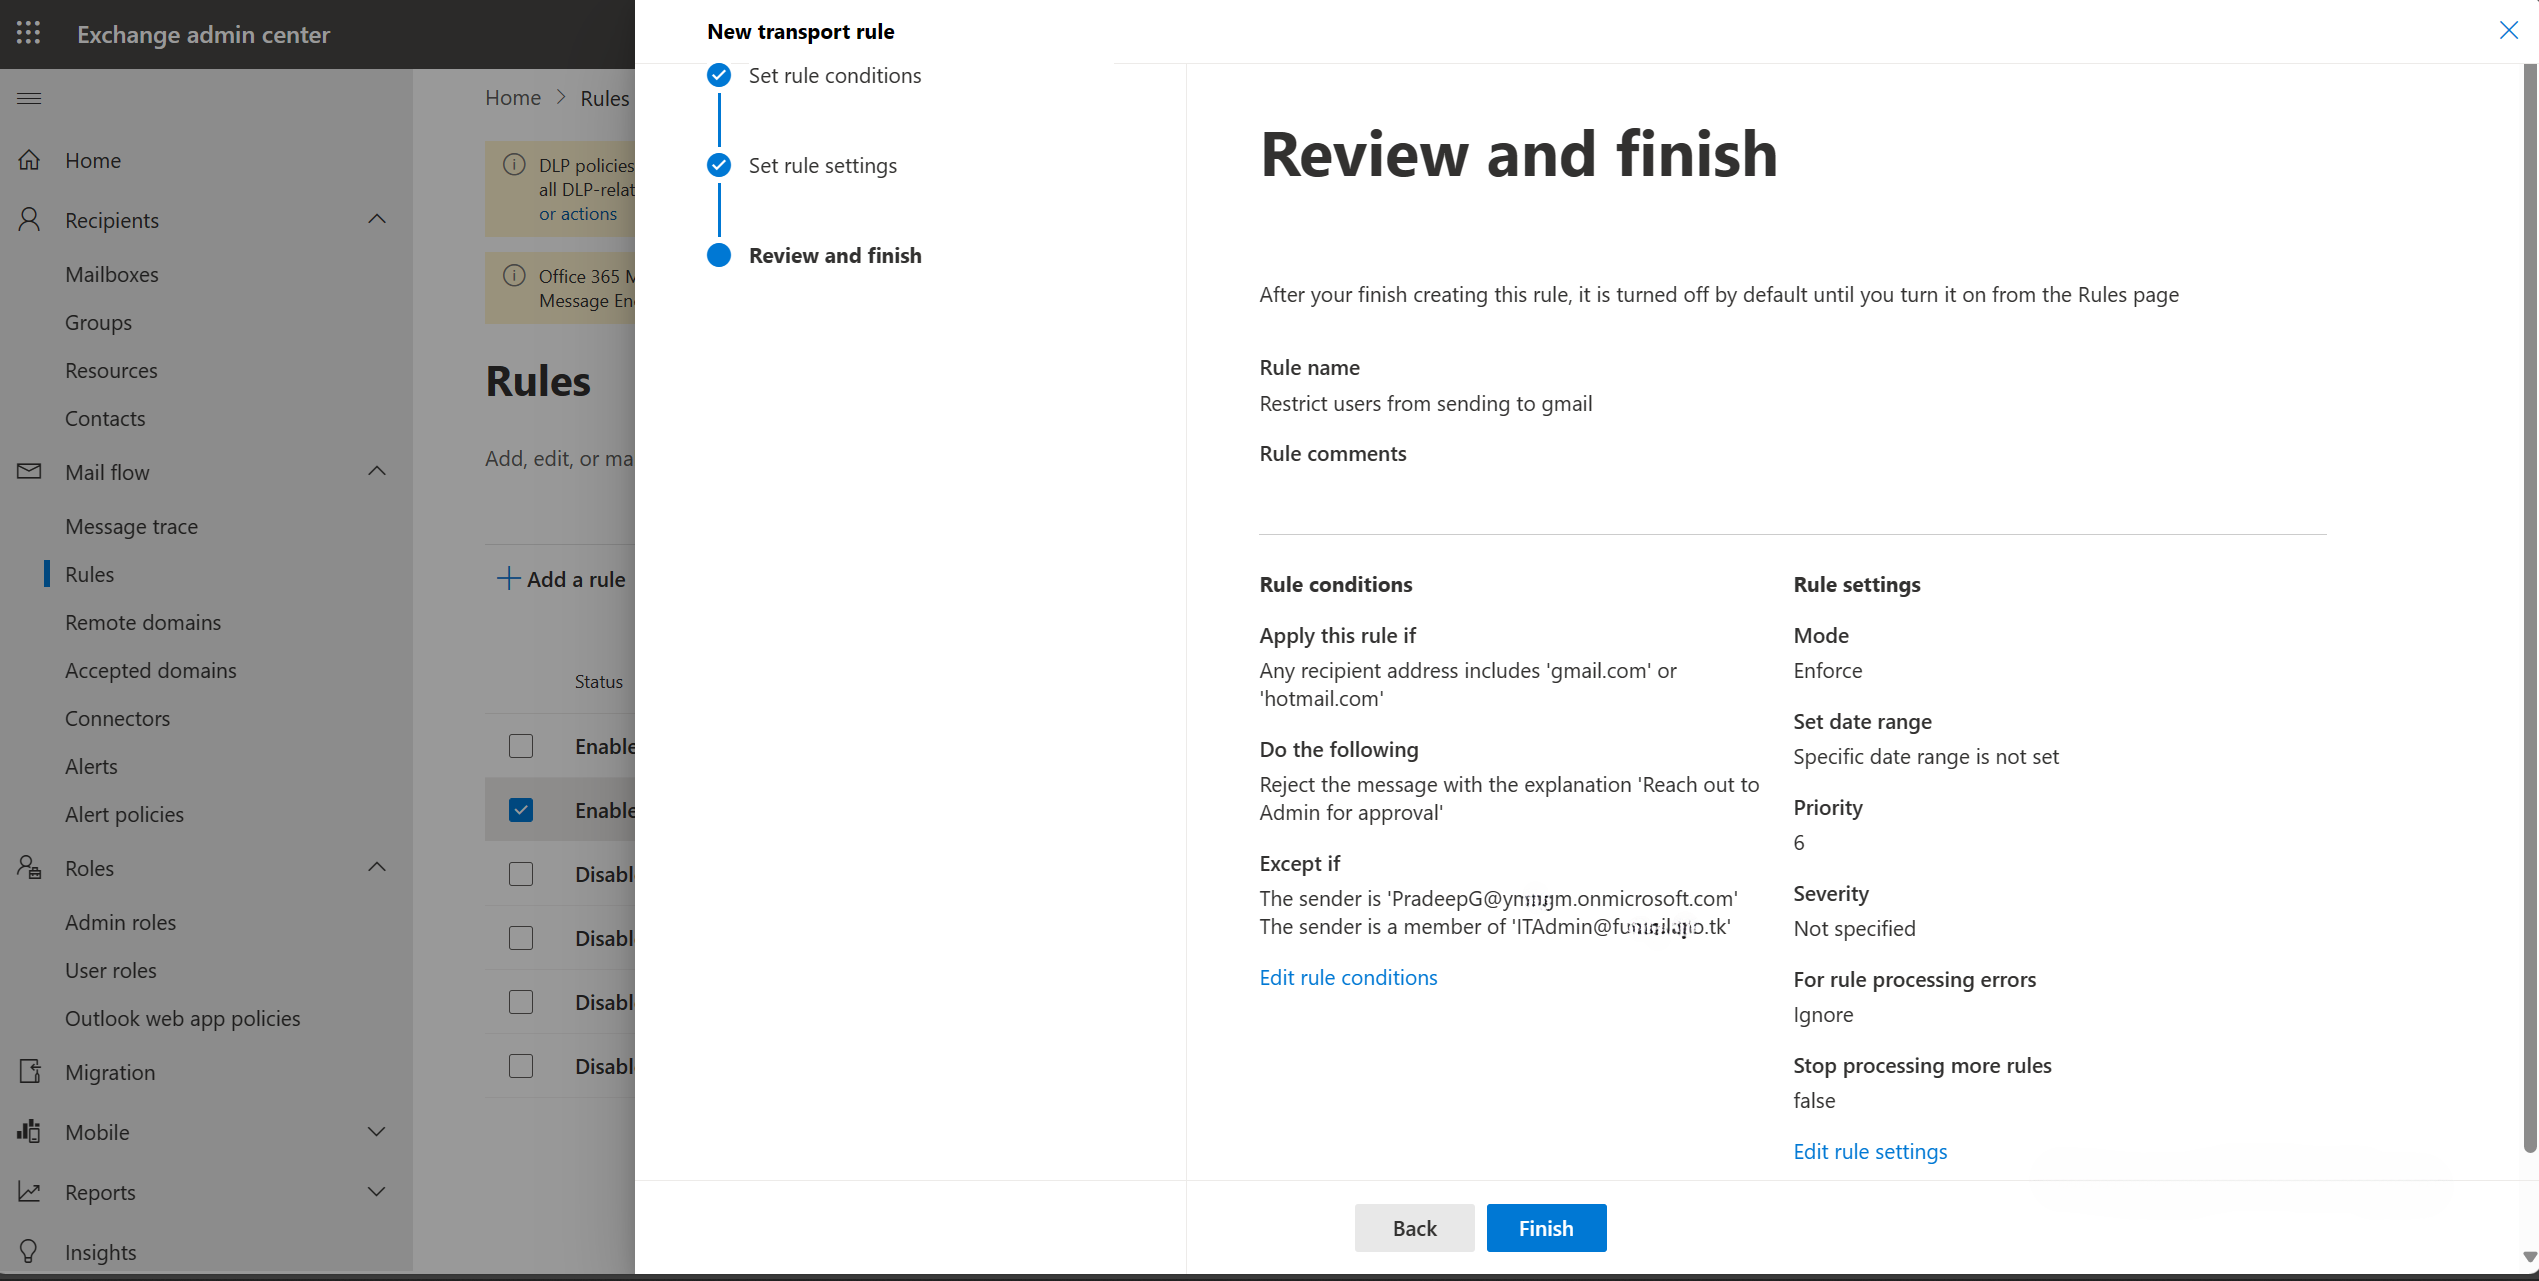
- Review and Submit the rule.
- Enable the rule and it will take a few hours to take effect for all users.
For more details, check out the official documentation on managing mail flow rules in Exchange Online
Viewing and Modifying Rules
To view rules in the Exchange Admin Center, navigate to mail flow – rules. Edit the rule. Make the changes you want to make. In modifying the rules, there are conditions, exceptions and actions to take.
Testing and Monitoring Rules
Always test rules to ensure they work for users across the organizations. It is essential to thoroughly test each rule.
Using PowerShell
Mail flow rules can be created with PowerShell. Connect to Exchange Online to create the rule.
To create a sample rule in PowerShell:
[aux_code language=”PowerShell” theme=”tomorrow” title=”” extra_classes=””]New-TransportRule -Name “Mark messages from the Internet to Sales DG” -FromScope NotInOrganization -SentTo “Sales Department” -PrependSubject “External message to Sales DG:”[/aux_code]
Conclusion
Customizing mail flow rules is important for security, privacy and compliance for organizations.
Evolve Connect is offering an extensive bootcamp on Microsoft 365 Training including Microsoft 365 and Exchange. Gain knowledge and industry experience. Register now!